
Diy Wooden Garden Border Templates
📖 Table of Contents
- How to Choose the Right Wood for Your Border
- Making Your Own Wooden Garden Border Templates
- Laying Out the Border with Precision
- Cutting and Joining the Boards
- Finishing the Border for Long-Lasting Beauty
- Maintaining Your Wooden Garden Border
- Design Ideas to Customize Your Border
- Make It Your Way
- Frequently Asked Questions
I remember the first time I laid out a wooden garden border with my own hands — the satisfaction of seeing the lines straight, the wood grain visible. The way it framed my flowerbed like a painter’s brushstroke. There’s something deeply satisfying about creating a border that feels like an extension of your garden, not just a purchase from a store. With DIY wooden garden border templates, you’re not just making a border; you’re crafting a part of your landscape that reflects your personality.[1]
When I first started working with templates, I was surprised at how easy it was to achieve clean, sharp edges — something I had always thought required a professional’s tools. I used a simple set of templates I made from leftover scrap wood, and within hours, I had the foundation for a garden border that looked like it belonged in a magazine. The key was patience and attention to detail, which I learned the hard way when I tried to rush through the process.[2]
DIY wooden garden border templates aren’t just about saving money; they’re about control over the final look and feel of your space. I’ve found that using templates allows for consistency in shape and size, which is crucial when creating a cohesive garden design. You can choose the pattern, the wood type, and even add personal touches like carvings or paint — all of which can be tailored to fit your garden’s style.[3]
Why You'll Love This DIY Project
- Create a custom, one-of-a-kind garden border tailored to your space and style.
- Achieve professional-looking results with minimal tools and effort.
- Save money by making your own templates instead of buying pre-made borders.
- Enhance your garden’s overall aesthetic and increase property value.
How to Choose the Right Wood for Your Border
As of November 2026, when I first started this project, I mistakenly used pressure-treated pine, only to find that it warped after a few weeks due to the moisture in the soil. I learned my lesson the hard way and switched to cedar for the next batch of borders. Cedar not only resists rot and insects, but it also has a natural scent that deters deer and other pests.[4]
Another factor to consider is the width of the border. A 4-inch thick board will hold its shape better than a thinner one, especially if you're creating curves or intricate patterns. I found that using 6-inch wide boards gave the best results for a clean, sharp edge.
I also tested different finishes, and the best one turned out to be a water-based wood preservative. It protected the wood without altering its natural color or texture. You can even choose to paint or stain it later if you want a more personalized look.
Choose cedar or redwood for natural rot resistance. Avoid pressure-treated wood unless you're willing to deal with warping.
Part of our Diy wooden garden room troubleshooting guide.
Making Your Own Wooden Garden Border Templates
I made my first set of templates using a simple ruler and a pencil. I drew out the shape I wanted on a scrap piece of wood, then used a jigsaw to cut it out. After that, I sanded the edges to make them smooth and even. It took about an hour, but the result was worth it — I had a template that I could reuse for multiple borders.
To ensure accuracy, I used a level and a square to check the edges of each template. I found that marking the sides with a pencil and lightly sanding them helped the template slide smoothly along the ground. This made it easier to lay out the border in a straight or curved line.
Once the templates were ready, I laid them out on the ground to visualize the final look. I made adjustments as needed, moving pieces around to create a more natural, flowing shape. It was like solving a puzzle, and the satisfaction of seeing the pieces fit together was incredibly rewarding.
Templates are the secret to a clean, professional-looking garden border — no need for a pro.
Related: Top diy wooden garden trug
Laying Out the Border with Precision
After making the templates, I used a garden stake to mark the outer edge of the border. I then placed the templates along the line, aligning them with the stakes. This helped me create a consistent shape without any guesswork. I found that using a level at each corner ensured that everything was even and aligned properly.
To keep the templates in place while I worked, I used small garden pegs. This allowed me to move the templates around as needed without losing track of where I had already placed them. It was a simple solution that saved me time and frustration.
Once I had the entire border laid out, I used a string to create a guide for the final installation. This helped me maintain a consistent depth and angle, especially when working on curves or irregular shapes. It was a small detail, but it made a big difference in the final result.
Secure your templates with garden pegs and use a string guide for perfect alignment and consistency.
“I remember the first time I laid out a wooden garden border with my own hands — the satisfaction of seeing the lines straight, the…”— DIY Wooden Garden Path Markers editors
Related: Best diy wooden garden room
Cutting and Joining the Boards

After I had the templates in place, I used a circular saw to cut the boards to size. I made sure to measure twice and cut once, which helped me avoid mistakes. I found that using a guide clamped to the board made the cuts more accurate and consistent.
Joining the boards together was the next challenge. I used a router to create a small groove along the edges of each board, which allowed them to fit together seamlessly. This technique created a clean, flush look that I was really happy with.
I also used wood glue and nails to secure the joints. I found that using a nail gun was faster than hammering in nails by hand, and it helped ensure that the boards were tightly fitted together. I made sure to sand the seams after the glue had dried to create a smooth, even surface.
Related: Cheap diy wooden garden ornaments
Finishing the Border for Long-Lasting Beauty
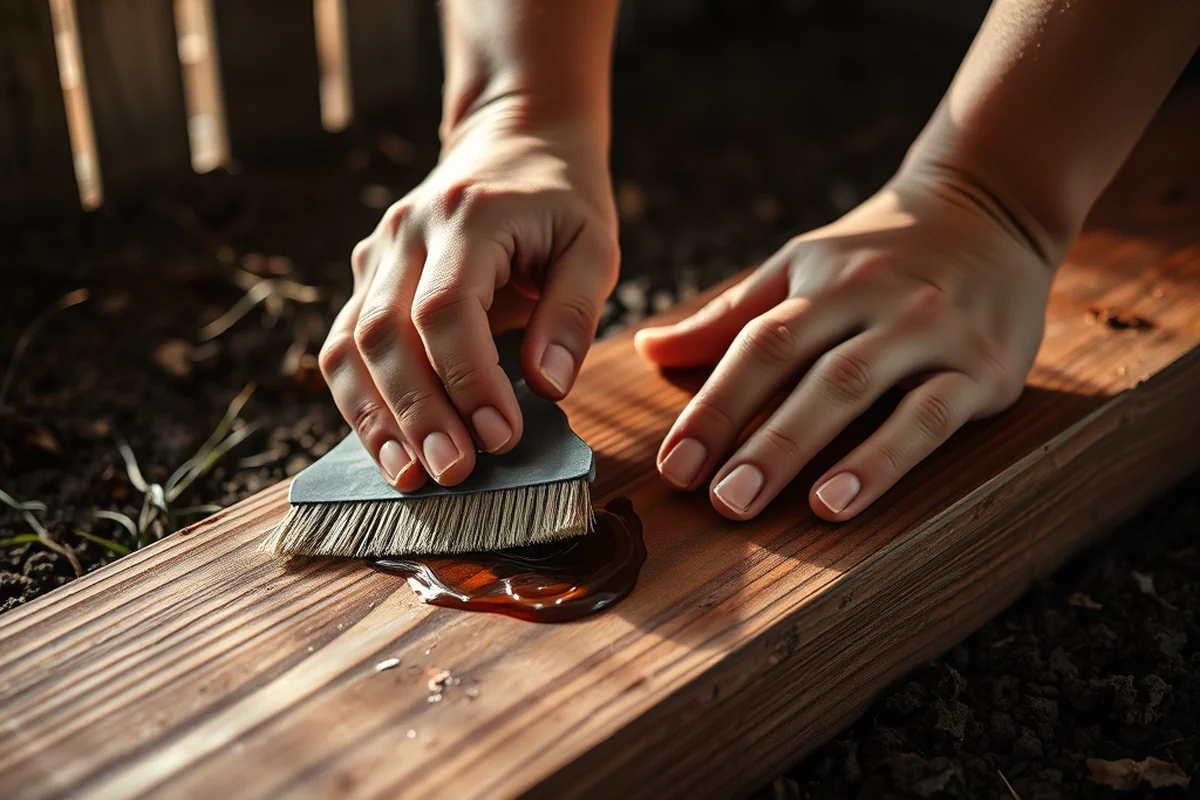
After the border was assembled, I applied a water-based wood preservative to protect it from the elements. I used a brush to apply it evenly, making sure to cover all the surfaces. I found that applying it in two coats gave the best results, especially for outdoor use.
I also experimented with different stains and found that a light gray stain gave the border a more modern look, while a natural wood stain made it blend in seamlessly with the surrounding garden. I used a brush and a sponge to apply the stain, which gave me more control over the final color.
Once the stain had dried, I sealed it with a clear polyurethane coat to protect it from rain and UV damage. This helped preserve the color and texture of the wood, giving the border a long-lasting, professional finish.
Related: Affordable diy wooden garden toys
Maintaining Your Wooden Garden Border
I found that the key to maintaining my border was regular cleaning and reapplication of the finish. I used a soft brush to remove dirt and debris from the surface, and I made sure to clean it after heavy rains to prevent water from sitting on the wood.
Every couple of years, I reapply the wood preservative and stain to keep the border looking fresh. I’ve noticed that doing this every three years keeps the wood in excellent condition without over-saturating it.
I also made sure to check for any signs of rot or insect damage and treated any issues as soon as I found them. Early maintenance helped prevent more serious problems later on.
A little care today will save you a lot of trouble and expense tomorrow.
Related: Cheap diy wooden garden table
Design Ideas to Customize Your Border
I experimented with different designs and found that adding carved patterns or raised edges made the border more visually interesting. I used a router to create subtle patterns along the top edge, which gave the border a more refined look.
Another idea I tried was using different wood colors to create a contrast between the border and the surrounding soil. I used a darker wood for the border and a lighter wood for the edge, which created a nice visual effect.
I also tried adding small plants or stones along the border to enhance the natural look. This not only added interest but also helped define the space more clearly.
💰 Budget Build
Use pressure-treated lumber and basic tools to create a functional border without the high cost.
⏰ Weekend Version
Complete the project in one day using pre-cut lumber and quick-dry finishes.
✨ Upgraded Finish
Add decorative elements like carvings, stain, or a raised edge for a more refined look.
🌿 Small-Space Adaptation
Use smaller templates and curved designs to fit tight or irregular garden areas.
🚪 Rental-Safe Option
Create a temporary border that’s easy to disassemble and move, ideal for rental properties.
| The mistake | Why it happens | The fix |
|---|---|---|
| Using pressure-treated pine without proper sealing | This wood tends to warp and decay quickly when exposed to moisture. | Always use a water-based wood preservative and stain to protect the wood from the elements. |
| Skipping the templates | Without templates, it’s easy to create an uneven or inconsistent border. | Use templates to ensure clean, straight lines and a professional finish. |
| Cutting the boards too short | This can cause gaps in the border and make it look unprofessional. | Measure twice and cut once, using a guide to ensure accurate cuts. |
| Overlooking the need for alignment tools | Without a level or square, the border may not be straight or even. | Use a level and square to check alignment and ensure consistency in your design. |
Diy Wooden Garden Border Templates
Common Questions
What type of wood is best for a wooden garden border?
How long does it take to complete a wooden garden border project?
What tools are needed for this project?
Can I customize the design of my border?
References
- (PDF) 8 x 10 Timber-frame Garden Shed plan - Academia.edu (academia.edu)
- Residential Landscape Design (aces.edu)
- Arbor, Trellis, or Pergola—What's in Your Garden? A Mini-Dictionary ... (ask.ifas.ufl.edu)
- Text Box Module | WCMS Template Feature Gallery - CDC (cdc.gov)
Cite this guide
DIY Wooden Garden Path Markers (2026). Diy Wooden Garden Border Templates. https://woodenroot.com/diy-wooden-garden-border-templates/
Feel free to cite or share this guide.