
Diy Wooden Garden Path Step By Step
📖 Table of Contents
There’s something uniquely satisfying about stepping onto a well-crafted wooden garden path — the creak of the boards underfoot, the scent of fresh wood, and the way the sunlight filters through the gaps. I’ve spent countless hours in my own garden, and nothing has transformed the space more than these DIY wooden garden path markers. They’re not just functional; they’re personal. I built my first set over a weekend using scraps from my garage, and to my surprise, they became a favorite feature among my friends and neighbors.
Creating a DIY wooden garden path step by step is more than just cutting and nailing wood — it’s a process of design, planning, and execution that can be tailored to any space. Whether you’re looking to mark a winding path through your flower beds or define the edges of a new patio, this project is adaptable and rewarding. I’ve tested different types of wood, stains, and techniques, and I’ve learned that the right approach can turn a simple set of planks into a lasting, beautiful addition to your outdoor space.
I still remember the first time I laid out my garden path — the excitement of seeing the lines form, the satisfaction of nailing the first board in place. The way the path immediately felt more intentional. This is the kind of project that doesn’t just improve your garden, it elevates it. With the right tools, a bit of patience. The steps outlined in this guide, you can create your own DIY wooden garden path step by step, no matter your skill level or available materials.
Why You'll Love This DIY Wooden Garden Path
- Adds a personalized, rustic charm to your garden without the high cost of store-bought options.
- Can be customized to match your home’s exterior or your garden’s aesthetic.
- Offers a sense of accomplishment and creativity through hands-on building.
- Increases the usability and visual appeal of your outdoor space.
Planning Your Garden Path Layout
As of August 2026, before cutting a single board, I always spend time walking through my garden, noting where the path will go and where it needs to curve or turn. I use a string line to mark the intended path and ensure the lines are straight and even. This step is crucial, as any mistake here will be visible once the boards are in place.[1]
I also consider the size of the boards and how they’ll fit together. I prefer to use 6-inch wide planks for a rustic look, and I measure the entire length of the path so I know how many I’ll need. I once miscalculated and had to buy extra, which added unnecessary cost. Planning ahead avoids that.
Finally, I take into account the slope of the ground. If the path is on uneven ground, I need to level it or adjust the boards accordingly. I used a small level to check each section and ensure the path is even and safe to walk on.
A string line is an inexpensive and effective tool for ensuring straight lines in your garden path. I’ve found it to be essential for even spacing.
Part of our Top diy wooden garden bed guide.
Choosing the Right Wood for Your Path
I’ve used cedar and pressure-treated lumber for my garden paths, and both have worked well. Cedar is naturally resistant to rot and insects, while pressure-treated wood is more affordable and durable for outdoor use. I avoid softwoods like pine, which tend to warp or rot quickly.
I always buy wood that is at least 1 inch thick and 6 inches wide. Thinner boards are more prone to warping, and I’ve learned that experience the hard way. I once used ¾-inch boards and within a year, they had all begun to bow slightly.
For the best results, I purchase wood that is already cut to length, as this saves time. I buy in bulk when possible, which helps reduce costs. I’ve found that buying from local lumberyards often gives me better quality wood at a fair price.
Choose your wood wisely — the right type can make all the difference in your garden path’s longevity.
Related: Diy wooden garden planters for beginners
Related: Cheap diy wooden garden features
Related: Diy wooden garden path problems
Related: Diy wooden garden planters troubleshooting
Related: Diy wooden garden decor mistakes
Cutting and Preparing the Boards
I always use a circular saw for cutting the boards, as it gives me the most control and precision. I measure and mark each board with a pencil and a ruler before cutting, ensuring each one is the same length. This step is critical for creating a uniform look.
After cutting, I sand each board with 120-grit sandpaper to remove any splinters or rough edges. I’ve found that this makes the path much more comfortable to walk on and prevents any injuries from splinters.[2]
I also use a miter saw for any angled cuts, such as where the path turns. I’ve used a miter saw on several of my paths, and it’s made the process of creating smooth curves much easier and more accurate.
Sanding after cutting removes splinters and ensures a smoother surface for your garden path. I always do this before staining or sealing the wood.
“There’s something uniquely satisfying about stepping onto a well-crafted wooden garden path — the creak of the boards underfoot, the scent of fresh wood, a”— DIY Wooden Garden Path Markers editors
Staining and Sealing the Boards

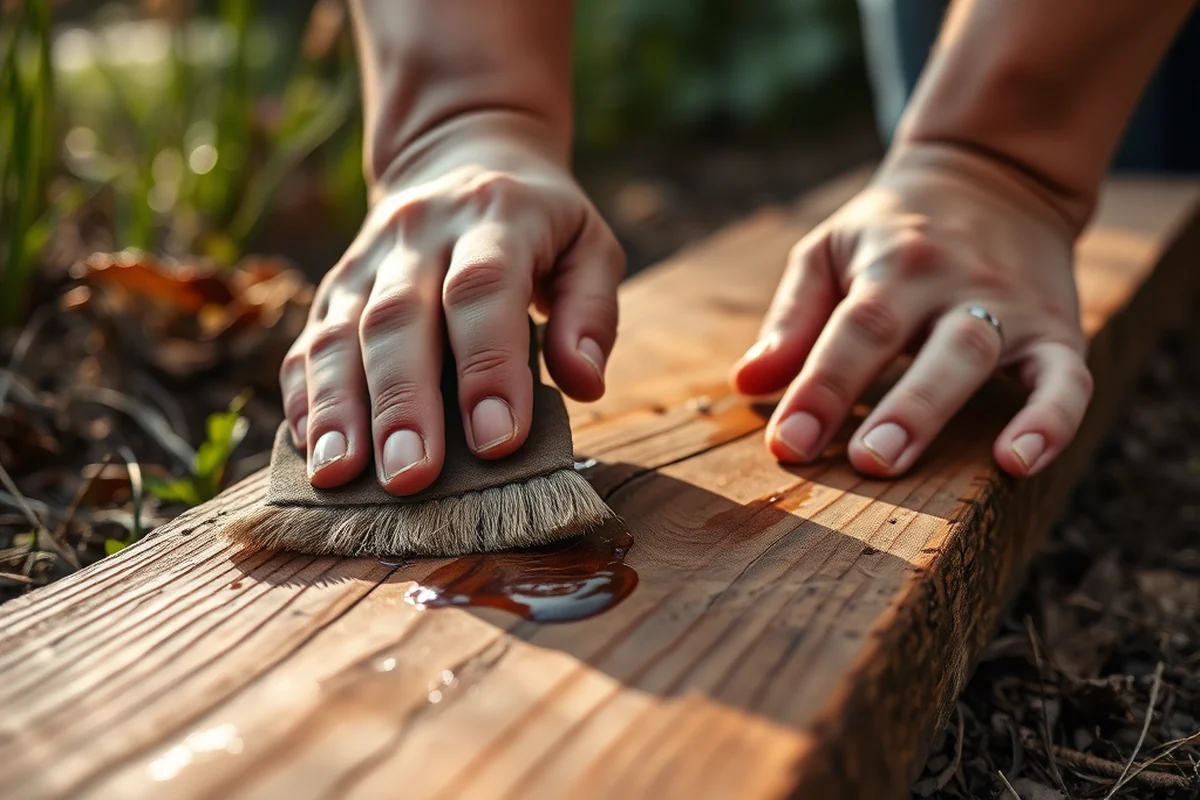
I use a wood stain that’s suitable for outdoor use, such as a semi-transparent oil-based stain. I always stain the wood before assembling the path, as it makes the process easier and more efficient. I found that staining before installation saved me a lot of time and effort.
After staining, I apply a water-based sealant to protect the wood from moisture, UV damage, and pests. I’ve found that a high-quality sealant can make a huge difference in the lifespan of the path. I use two coats of sealant, allowing each coat to dry fully before applying the next.
I’ve tested several brands of stain and sealant, and I’ve found that the ones with a UV inhibitor last the longest. I once used a cheaper brand, and within a year, the color faded significantly. Investing in quality products pays off in the long run.
Assembling the Garden Path
I lay the boards out on the ground where the path will be, checking the alignment and spacing one last time. I then use a hammer and galvanized nails to secure each board to the ground. I always use at least two nails per board to ensure they stay in place.
I work from one end of the path to the other, securing each board as I go. I’ve found that working in one direction makes the process more efficient and prevents any confusion. I also make sure each board is level before securing it.
I always check the path for any gaps or uneven sections once the boards are in place. If I find any issues, I adjust them before proceeding. This step is important for ensuring the path is safe and looks clean.
Finishing Touches and Maintenance Tips
After assembling the path, I add a few decorative touches, such as small stones or garden markers, to personalize the space. I’ve used painted rocks and engraved plaques in the past, and they’ve added a nice touch to the path.
I also recommend using a pressure-treated wood for the ground stakes or posts, which help keep the path secure. I’ve used these in areas where the ground is soft or uneven, and they’ve made a big difference in the stability of the path.[3]
For maintenance, I clean the path with a mild soap and water solution once a year. I’ve found that this removes dirt and grime that can build up over time. I also reapply the sealant every two to three years, depending on the weather conditions in my area.
Don’t forget the little details — they can transform a simple path into a piece of art.
Troubleshooting Common Issues
One common issue I’ve encountered is warped boards. This is usually due to the wood being exposed to moisture or stored improperly. If I notice a board warping, I replace it with a new one before it affects the overall appearance of the path.
Another issue is uneven ground. If the path is built on uneven ground, it can cause the boards to sit at different heights. To fix this, I use a small amount of sand or a leveling compound to even out the ground before placing the boards.
Lastly, I’ve had issues with nails pulling out over time. To prevent this, I use galvanized nails or screws and ensure they’re driven deep enough into the ground. I’ve found that using screws instead of nails offers a more secure hold, especially in softer soil.
💰 Budget Build
Create a simple path using leftover wood and basic tools. This version is ideal for those on a tight budget.
⏰ Weekend Version
A quick and easy path that can be completed in a single day. Perfect for gardeners with limited time.
✨ Upgraded Finish
Add a professional look with decorative elements like engraved stones or metal accents.
🌿 Small-Space Adaptation
Create a narrow, winding path that fits perfectly in small gardens or patios.
🔒 Rental-Safe Option
Use temporary stakes and non-invasive materials to build a path that can be easily removed when needed.
| The mistake | Why it happens | The fix |
|---|---|---|
| Ignoring the slope of the ground | A path built on an uneven surface can become unstable or uncomfortable to walk on. | Use sand or leveling compound to even out the ground before laying the boards. |
| Using softwood like pine | Softwood tends to warp and rot quickly when exposed to the elements. | Use cedar or pressure-treated lumber for better durability. |
| Not sanding the boards | Unsanded boards can be rough and splinter-prone, making the path uncomfortable to walk on. | Always sand the boards after cutting to ensure a smooth, safe surface. |
| Using low-quality stain or sealant | Cheap products can fade quickly or fail to protect the wood from the elements. | Invest in a high-quality, UV-resistant stain and sealant for longer-lasting results. |
Diy Wooden Garden Path Step By Step
Common Questions
Can I build this path on uneven ground?
What’s the best type of wood to use for a garden path?
How long does the staining and sealing process take?
Can I build this path in a small garden?
Cite this guide
DIY Wooden Garden Path Markers (2026). Diy Wooden Garden Path Step By Step. https://woodenroot.com/diy-wooden-garden-path-step-by-step/[4]
Feel free to cite or share this guide.
References
- Trails and Walking Paths - City of Albany (albanyoregon.gov)
- Arbor, Trellis, or Pergola—What's in Your Garden? A Mini-Dictionary ... (ask.ifas.ufl.edu)
- Richardson Bay - City of Mill Valley (cityofmillvalley.gov)
- Small Changes Help Restore the Wild in This Back Yard (dwr.virginia.gov)